Aligning my EK43 Burrs (hopefully…) – Part 1
Last week a fellow coffee geek messaged me asking about burr alignment and also proposed a fairly simple method to have a crack at it. Since then it’s been playing on my mind so I thought I’d do some research. After reading some great info over in the slack @ baristahustle.com on the subject I finally decided to give it a go!!
The method – EK43
Step 1
Remove the burr carrier and with a non-permanent black marker colour the top burr edge in. I chose to do the static burr first.
Step 2
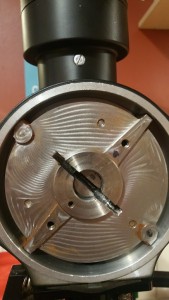
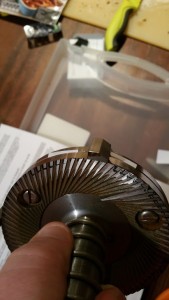
Put the grinder back together (I mark mine to ensure it goes back the same way each time see pic below) and use the standard EK calibration method to bring the burrs just close enough that they chirp.
Step 3
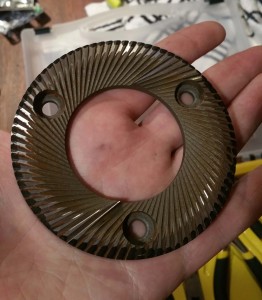
Remove the burr carrier once more and inspect the static burr. Note areas where the marker pen has been cleaned, these area are where the burrs have touched together.
In my case pretty much all of the pen had been removed from the static burr so I decided to leave it as is.
Repeat Steps 1-3 for the burr fixed to the carrier.
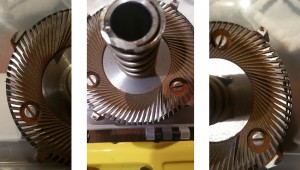
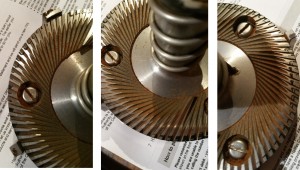
In my case this was the result from the second burr
You can hopefully see that about 1/4 of the burr has had the pen removed and the other 3/4 has not been touched.
Step 4 – The adjustment
There were a few suggested materials that could be used as shims for altering the burr height. Kitchen foil being the thinnest and then paper if you needed something a little thicker.
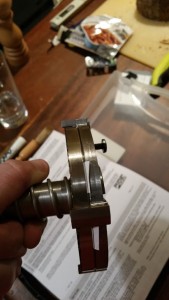
As I’m impatient I went straight for the paper (a bank statement to be more accurate). I simply cut a couple of small pieces of paper, loosened the screws holding the burr in place and then slipped them between the burr and carrier in the areas where the burr had not been touched. I was careful to leave some space around the area that did touch as I didn’t want to raise this any further, the idea being to raise only the areas where the burr did not make contact previously.
After you’ve shimmed the burr, repeat steps 1-3 and assess the impact of the changes.
I noticed that there was still a section directly opposite the previous highest point that was still untouched. In my case I simply took the two shims that sat under this section and folded them in half to raise the burr even further. I then repeated steps 1-3 and the result was this
The majority of the pen had been removed and everything seemed to be in order (or as close as I could be bothered to get it anyway) so I cleaned up both burrs and put the grinder back together making sure it was as I’d taken it apart.
So the question is, was it all worth it? Well you’ll have to wait for part 2 to find that out!!

9 Comments. Leave new
Hello
Is this procedure carried out on the new coffe burrs or the old coffee burrs ?
Thanks
Hi,
The procedure is valid for any type of EK burr, coffee, new coffee, turkish.
Thanks
Hello
Thanks, sorry, I meant did you try it on new or old burrs.
Did you notice a difference in grind quality ?
I have tried the same procedure using water colour paint as the marker.
Thanks
[…] burrs themselves are aligned correctly (An Ahab action if ever there were […]
Great read Michael 🙂
hello,
thanks for the write up.
However can’t you only do this on the static burr? as in the inner bur on the ek 43?
for example if you rotate two coins in the same way coffee burrs rotate, the rotating coin will rub its entire edge against one specific
part of the static coin (assuming the coins are not rotating parallel) So if you go had marked both coins the static coin would only have been rubbed off in one area and the
rotating coin would have lost all its ink .
Hi Marc, I completely agree, shimming the rotating burr might never be perfect. It does depend on where the issue comes from of course. Some defects can be fixed with a shim, others not.
Cheers
Spence
Where is part 2? Am I being daft or blind?
Ignore me I found it sorry